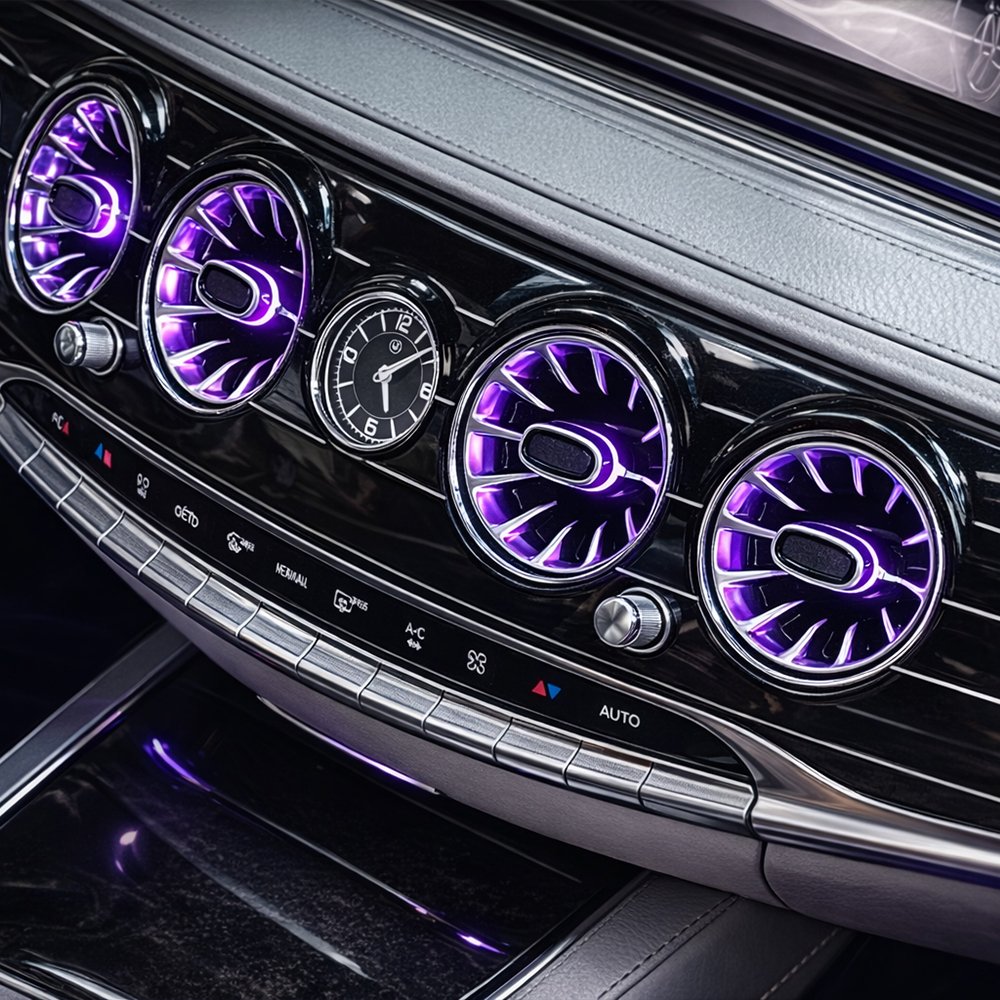
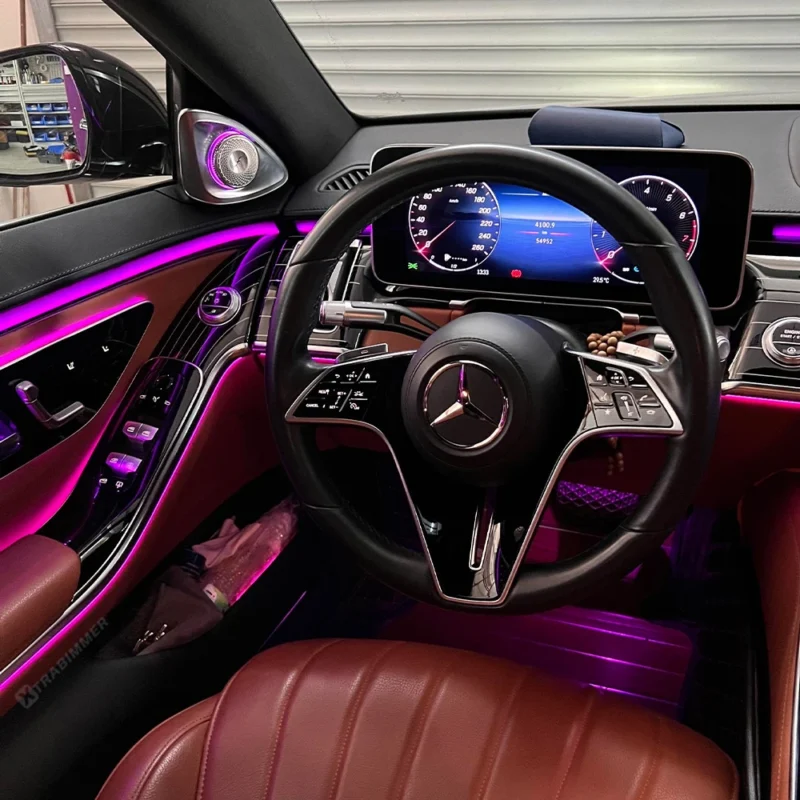
Transforming your W222’s traditional louvers into 64-color LED Turbo-style vents is more than just a cosmetic change—it's a complete interior evolution. This upgrade bridges the gap between classic luxury and modern tech-aesthetics.
Key Benefits:
OEM+ Aesthetic: Seamlessly integrates with the factory dashboard for a high-end look.
Dynamic Lighting: Fully syncs with the original ambient lighting system, including brightness and color transitions.
Enhanced Cabin Depth: Adds a sophisticated glow to the central and side dash, creating a more expansive and premium nighttime driving environment.
I. Preparation & Tools Required
T20/T30 Torx Screwdriver: To remove the main dashboard and center console screws.
Plastic Trim Removal Wedges: To safely pry the dashboard leather and trim.
Hook Tool: Useful for pulling out the original circular air vent units.
Fleece/Insulating Tape: To wrap the new harness and prevent rattles (NVH).
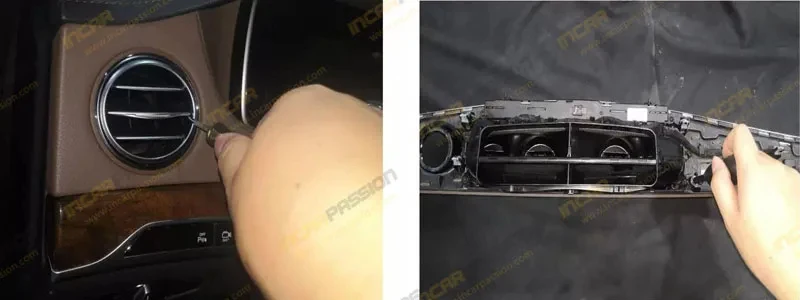
II. Dashboard & Trim Disassembly
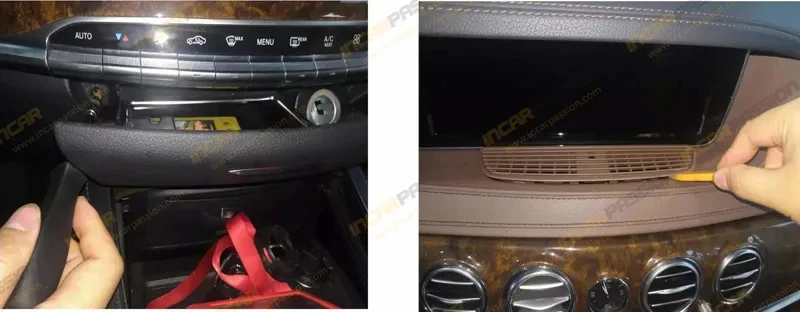
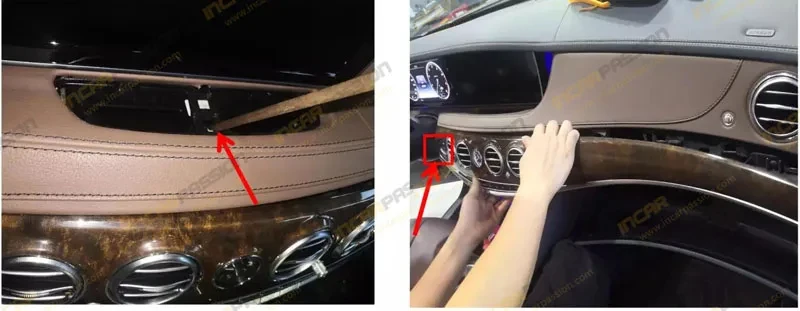
Remove the Main Carbon/Wood Trim: Use a plastic pry tool to gently release the long decorative trim strip that spans the dashboard. Start from the passenger side and work toward the steering wheel.
Unscrew the Air Vent Housing: Once the trim is loose, locate and remove the T20 screws securing the air vent assembly to the dashboard frame.
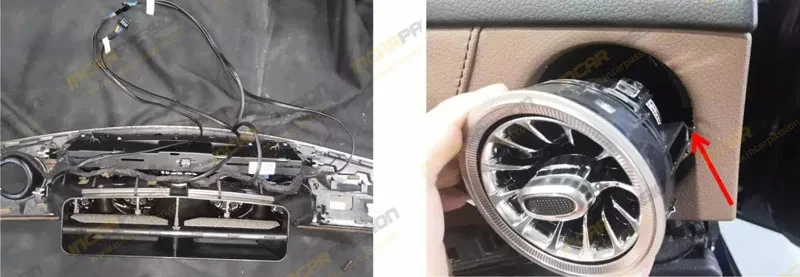
Detach Center Clock & Buttons: Carefully unplug the analog clock and hazard light button connectors before fully removing the trim section.
Extract Original Vents: Use the hook tool or firm hand pressure from behind the trim to pop the old rectangular/circular vents out of their sockets.


III. LED Air Vent Installation & Wiring
Mount the Turbo Vents: Snap the new LED Turbo Vents into the original positions. They are designed for OEM-fit, so they should "click" into place without modification.
Connect the LED Harness: * Each vent has a small LED light source. Connect these to the included Y-splitter harness.
Route the main harness toward the Footwell Ambient Light or the Center Console Module.
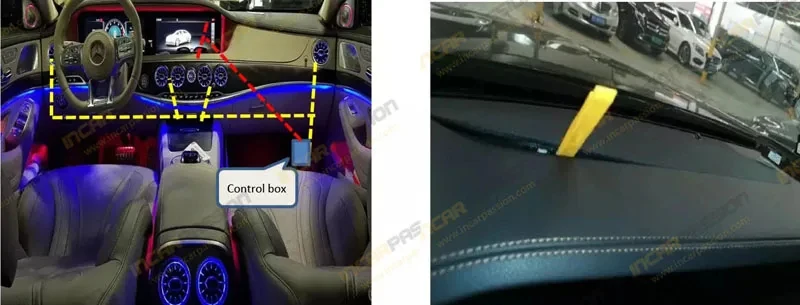
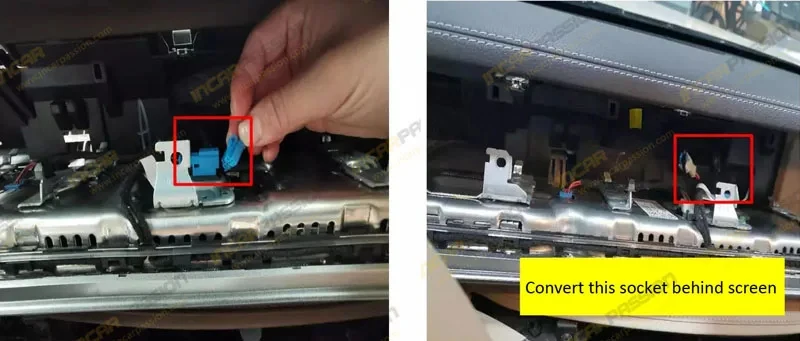
Plug & Play Integration: * Locate the original ambient light plug (usually a 4-pin or 3-pin connector).
Connect the transition cable from the kit between the factory plug and the car's module. No wire cutting is required.
IV. Testing & Reassembly
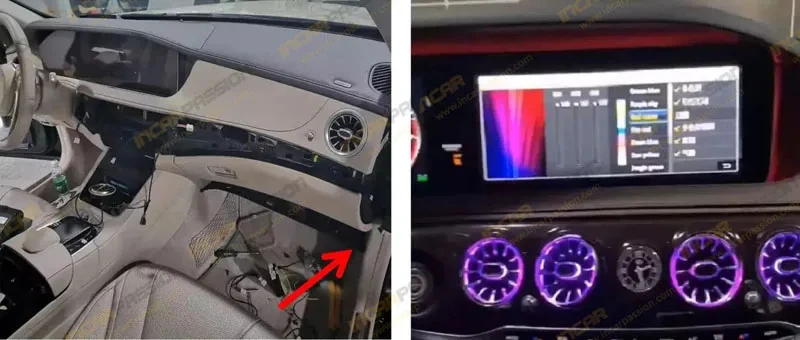
Lighting Sync Test: Turn on the ignition and use the COMAND/MBUX system to cycle through colors. Ensure the air vents change color in perfect sync with the dashboard and door lights.
Check Airflow: Ensure the vent adjustment knobs (open/close) and directional fins move freely.
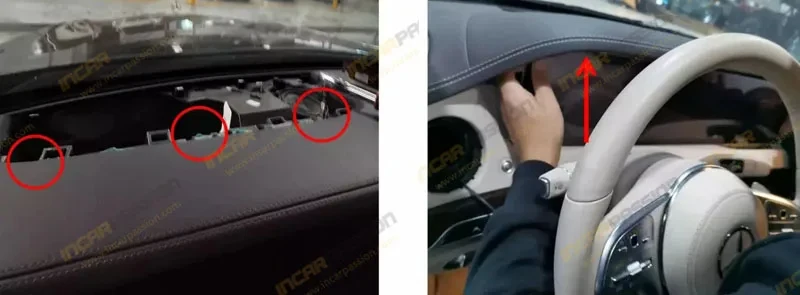
Final Reassembly: * Tidily bundle the wires using fleece tape to avoid "clicking" noises.
Reinstall the dashboard trim, reconnect the clock/buttons, and tighten all T20 screws.
Press the trim firmly until all metal clips engage.
💡 Pro-Tips for W222
Brightness Match: High-quality kits allow you to adjust the vent brightness directly through the vehicle's "Ambient Lighting" menu.
Pre-Facelift (7-Color) vs. Facelift (64-Color): * 2014–2017 models usually have 7 colors.
2018–2020 models have 64 colors.
Ensure your protocol box matches your specific year to avoid color flickering.
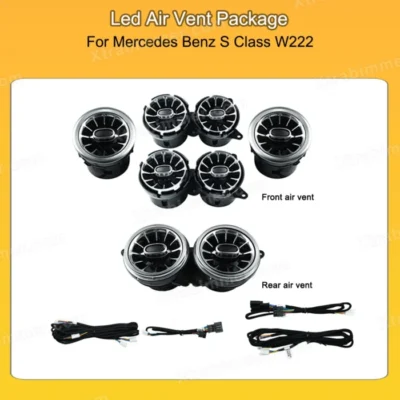
Rear Vents: If your kit includes rear seat vents, you will need to remove the rear end of the center console (usually 2 screws behind the carpet/trim) to access the wiring.
 Toyota