Transform Your BMW G60/G68 Interior Comfort & Style
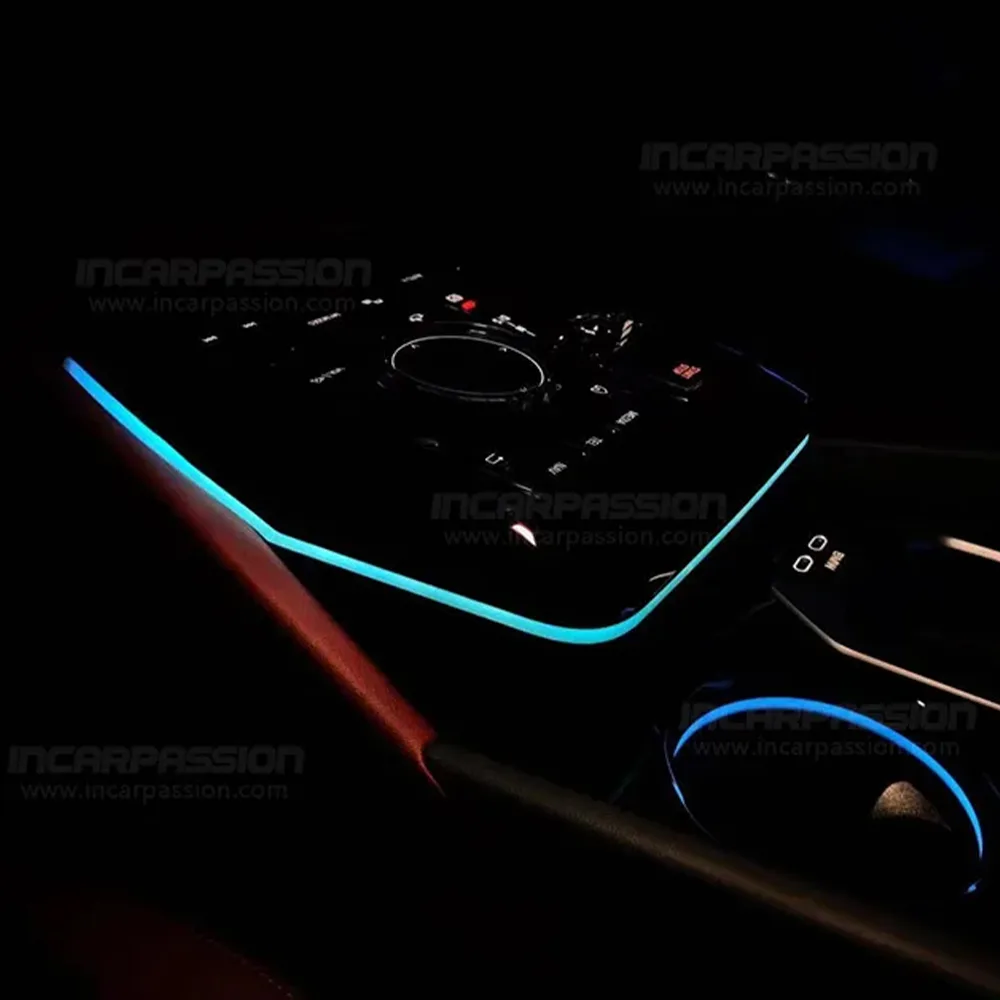
Take your 2024+ BMW 5 Series to the next level with our premium Crystal Center Console Ambient Light Upgrade. This luxury saddle enhancement replaces the standard console trim with a sophisticated, light-refracting crystal design that dramatically improves the vehicle's nighttime aesthetics and cabin ambiance.
Below is our detailed installation guide to help you seamlessly integrate this premium upgrade into your BMW G60/G68, ensuring perfect OEM-style fitment and a truly refined driving experience.

Installation Video:
Installation Tip: Please turn off the vehicle's ignition before starting. It is highly recommended to use a plastic non-marring pry tool to prevent scratching the high-gloss trim or the crystal surface of your car.
🛠️ Required Tools & Preparation
Before you begin, ensure the vehicle's ignition is completely turned off. To prevent any short circuits, it is highly recommended to wait 5–10 minutes until the car's electrical modules go to sleep.
Plastic Trim Removal Tool (Pry tool)
Torx T20 Screwdriver (Standard for BMW interior screws)
Microfiber towel (To protect the leather and piano black surfaces)
Step-by-Step Installation
Step 1: Remove the Armrest Compartment Rubber Liner
Action: Open the split center armrest console doors completely. Locate the non-slip rubber liner at the very bottom of the storage compartment.
Detail: Insert a small plastic pry tool or use your fingers under the edge of the rubber mat to lift it out.
Note: Cleaning the bottom of the compartment beforehand ensures the rubber liner doesn't pull up dirt, revealing the hidden mounting screws underneath.
Step 2: Remove the First Set of Torx Screws
Action: Use a Torx T20 screwdriver to remove the two visible screws at the bottom of the armrest box.
Detail: Keep these screws safe in a magnetic tray or a cup. Do not drop them down into the console framework, as they can cause rattles later.
Step 3: Pry Open and Extract the Inner Storage Liner
Action: Insert a wide plastic pry tool into the seam between the inner storage bin wall and the outer console trim.
Detail: Gently pry upward around the top perimeter to release the plastic friction clips holding the bin in place. Once loose, pull the inner storage box straight up and out of the center console entirely.
Pro Tip: Be mindful of any factory USB ports or utility lights inside the box; if your model has tight wiring harnesses connected to the bin, unplug them carefully before fully removing the liner.
Step 4: Unbolt and Lift the Center Control Panel Assembly
Action: Look down into the newly exposed cavity. You will find two additional deeper Torx T20 screws securing the main center control panel (the section housing the iDrive controller, start button, and gear selector).
Detail: Remove these two screws. Next, starting from the rear (armrest side), grab the edges of the center control panel and pull upward firmly but carefully. Work your way forward to pop the main retaining clips out of the console chassis.
Caution: Do not yank the panel off. It is attached to several fragile factory wiring harnesses underneath (iDrive controller, electronic parking brake, etc.). Slide a microfiber towel underneath the panel to prevent the sharp underside from scratching the surrounding leather or piano black trim.
Step 5: Replace the Factory Trim with the Crystal LED Module
Action: Carefully flip the center control panel over or tilt it up to access its underside.
Detail: Locate the screws holding the factory matte or standard plastic saddle/side trim piece in place. Remove these screws and release the factory trim clips. Take your new Crystal LED Frame Module, align it perfectly with the factory mounting points, and snap it into place. Secure it tightly using the screws you just removed.
Check: Ensure the crystal module sits completely flush with the panel surface from the top view before moving to the next step.
Step 6: Plug-and-Play Wiring Connection (No Wire Cutting)
Action: Take the provided ambient light control box and drop it neatly into the open console cavity, ensuring it won't rattle against the plastic frame.
Detail: Locate the factory factory cup holder ambient light plug. Disconnect this OEM plug. Connect the male end of our custom harness into the factory plug, and the female end back into the cup holder light. This creates a perfect Y-tap (Plug-and-Play) system.
Note: Route the wires cleanly away from any moving parts (like the mechanical armrest latches or shifting linkages) and use zip ties if necessary to keep everything secure.
Step 7: Functional Test and Reassembly
Action: Before screwing anything back down, press the vehicle's Start button to power up the electronics.
Detail: Check the new Crystal Center Console Light. Ensure it illuminates evenly, changes colors in sync with your factory BMW ambient lighting menu, and responds correctly to brightness adjustments.
Reassembly: Once everything tests perfect, turn off the vehicle. Push the center control panel back down until all factory clips click into place, reinstall the two inner screws, slide the storage liner back in, secure the final two bottom screws, and drop the rubber liner back in place.
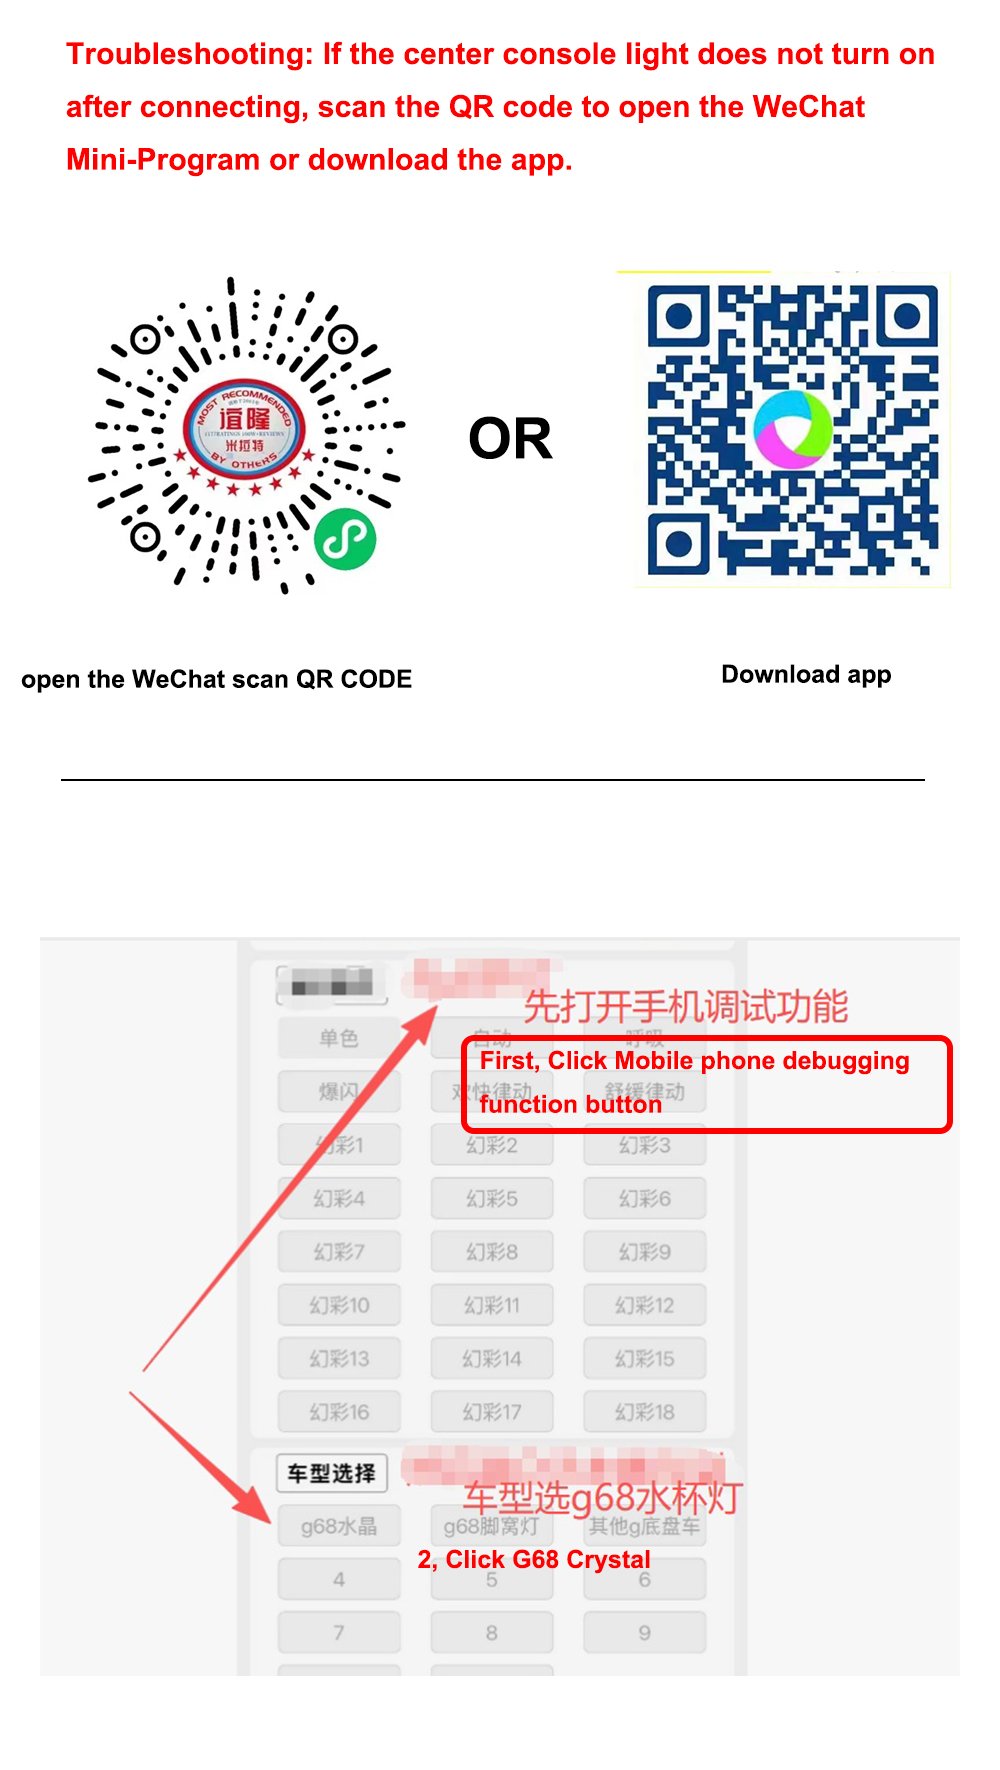
Step 8:Troubleshooting: If the center console light does not turn on after connecting the controller
 Toyota