


Hey fellow Bimmer fans! If you feel like your BMW 3 or 4 Series (G20/G22/G23/G26) interior is missing that extra "wow" factor at night, this project is for you.
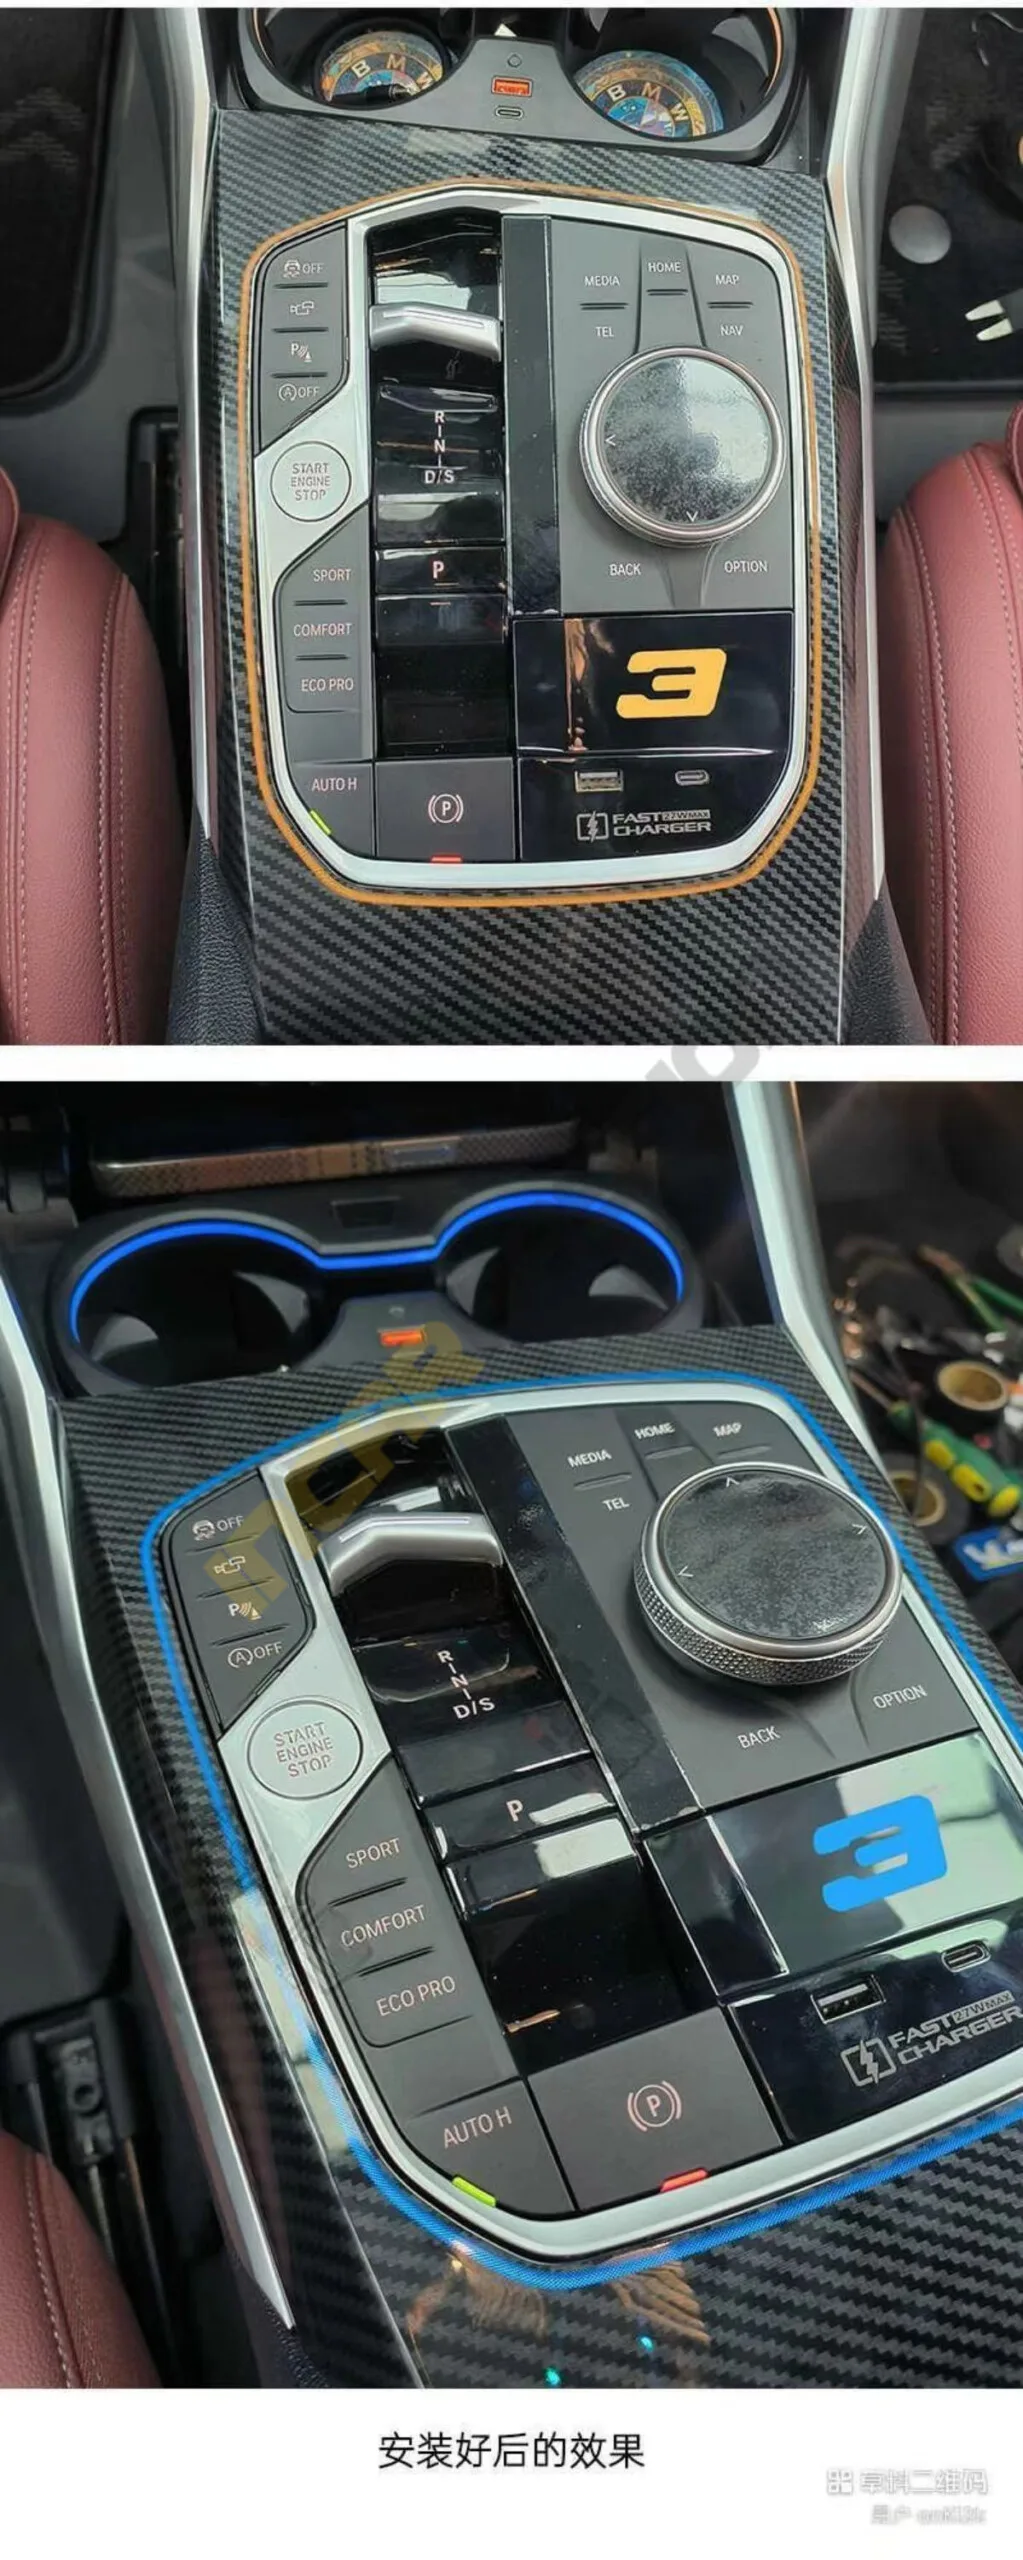
Today, I’m walking you through a complete retrofit of the Gear Saddle Ambient Light and an Illuminated Fast-Charging Dock. This upgrade completely transforms the center stack, giving it that high-end, modern aesthetic we all love.
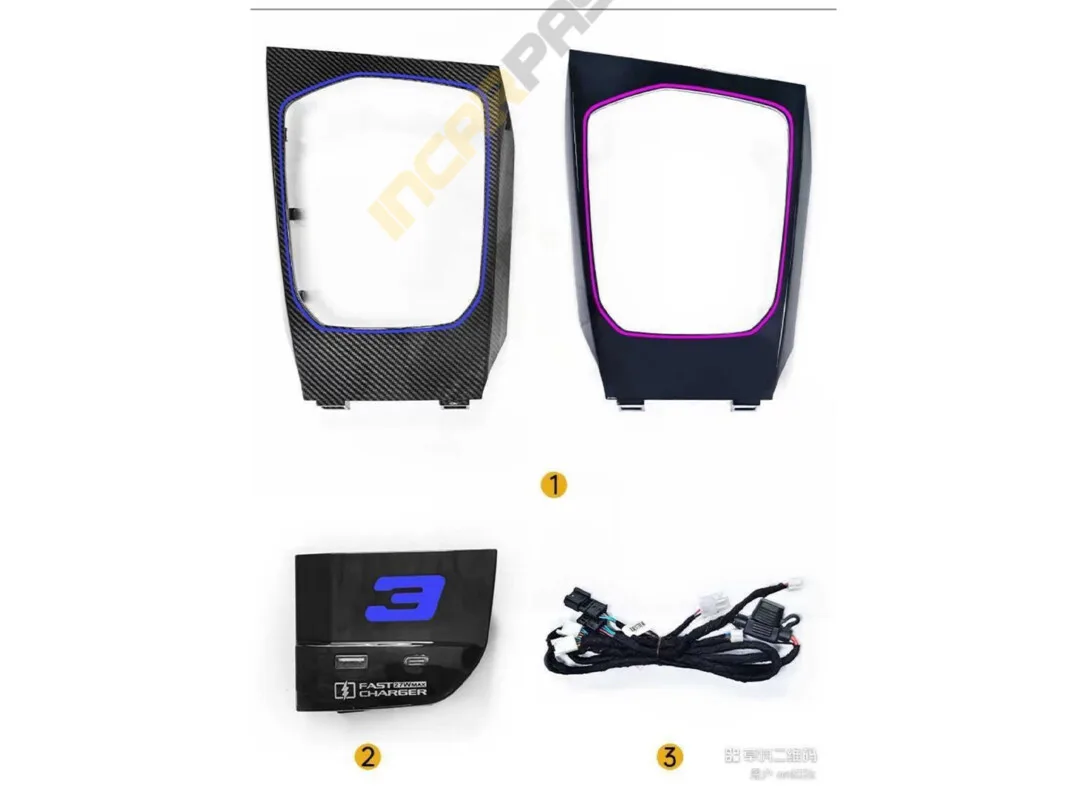
Before we start, make sure you have your kit ready. My kit included:
Replacement Saddle Light Trim (I chose Carbon Fiber style, but Piano Black is also available).
3 Series Specific Fast-Charging Dock.
Wiring Extension & Adapter Cables.
If you don't have these kits, please find them here at this link.
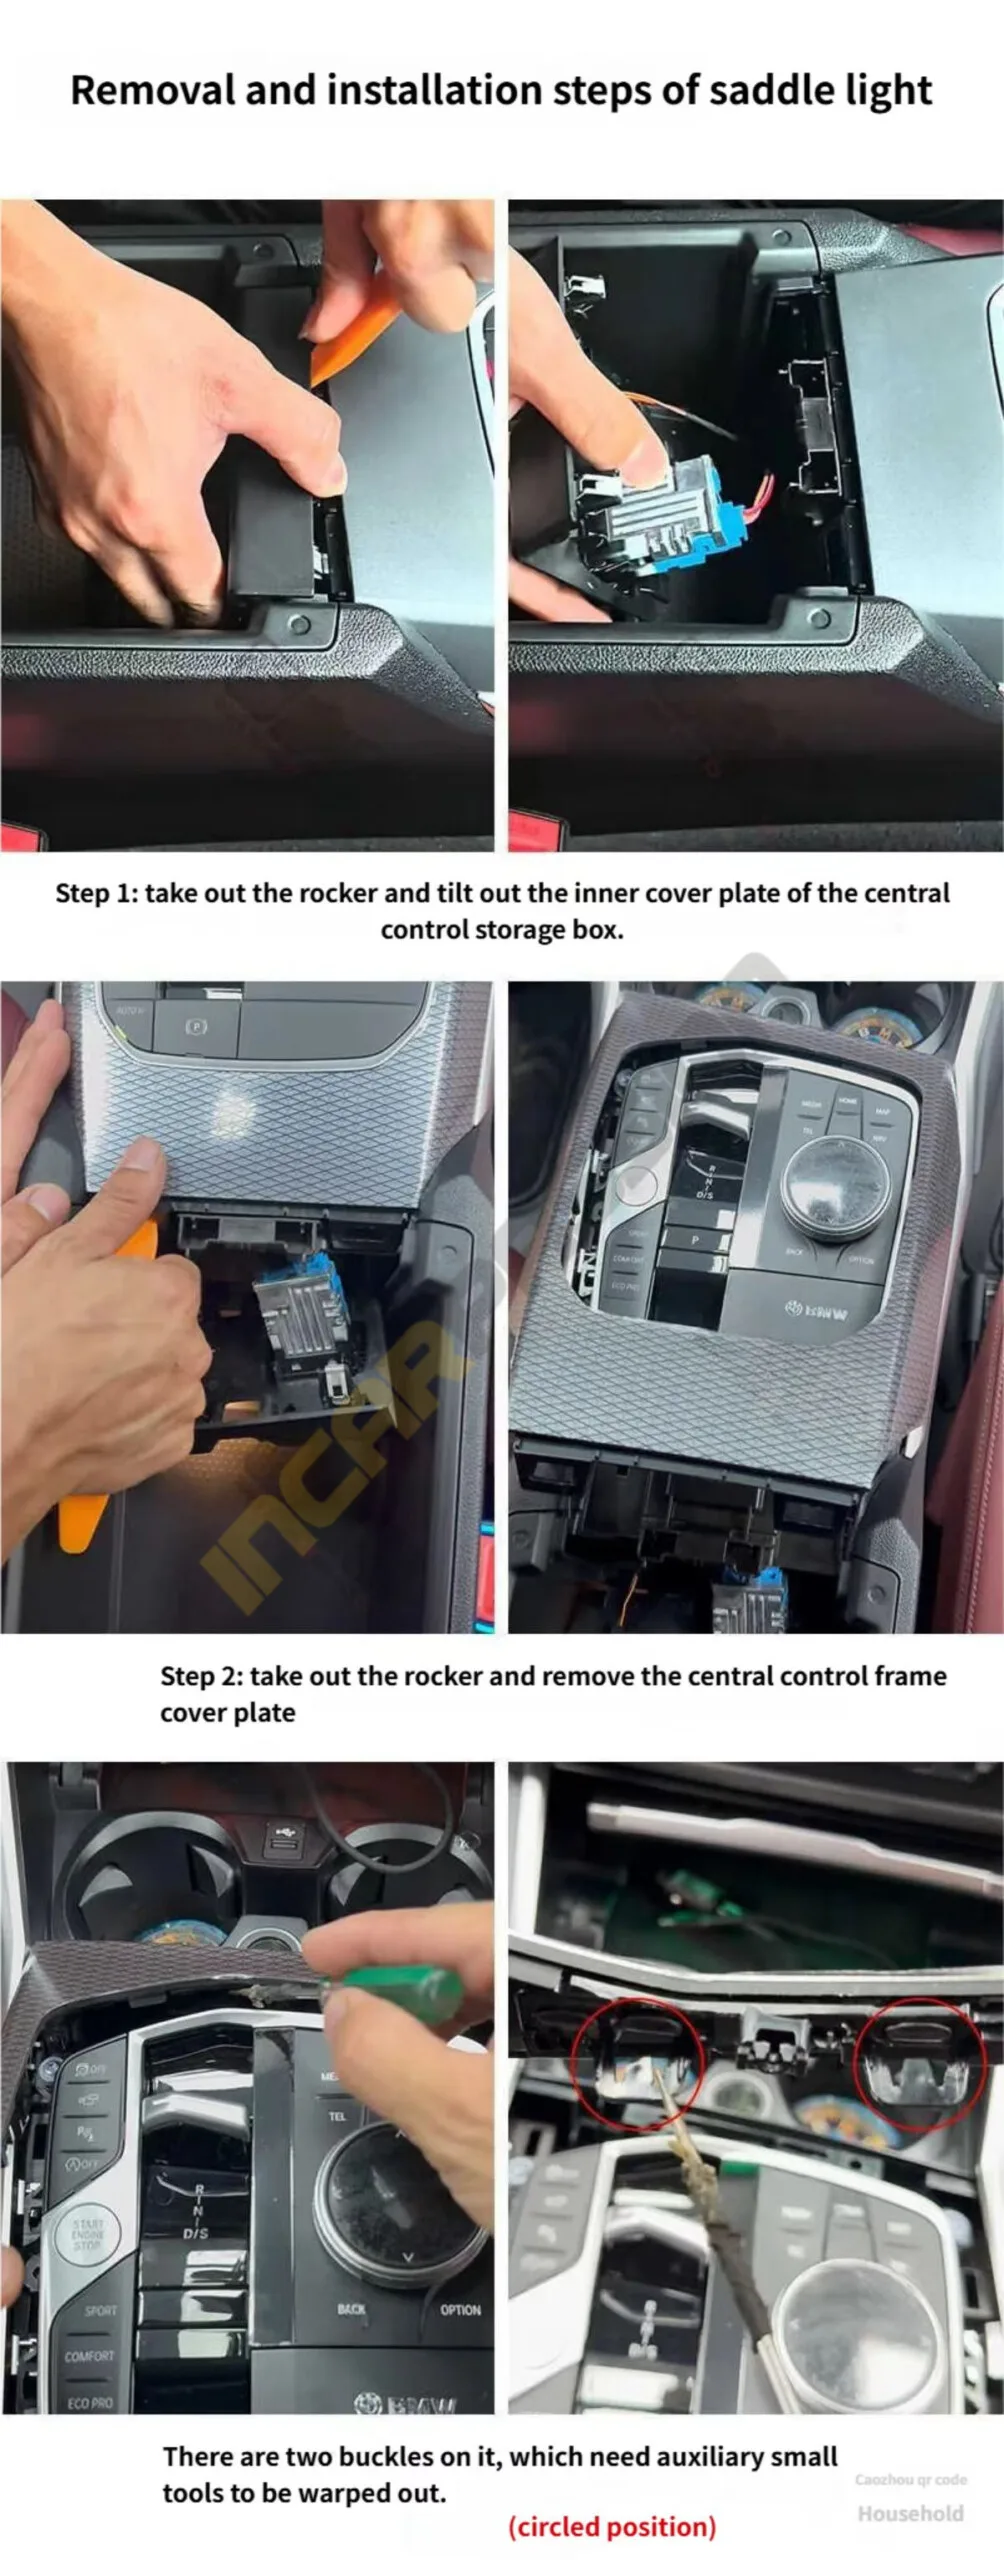
Opening Up: I started by removing the gear rocker assembly. Then, I carefully tilted open the inner cover plate of the central control storage box (the armrest bin).
Popping the Frame: Next, I pried up the central control frame cover plate. Take your time here—you don't want to snap any clips!
Transferring the Buckles: Using a pair of pliers, I removed the 9 original metal buckles from the factory trim.
Setting the New Base: I then installed those same 9 buckles onto my new saddle light trim. This ensures the new piece fits as securely as the OEM one.
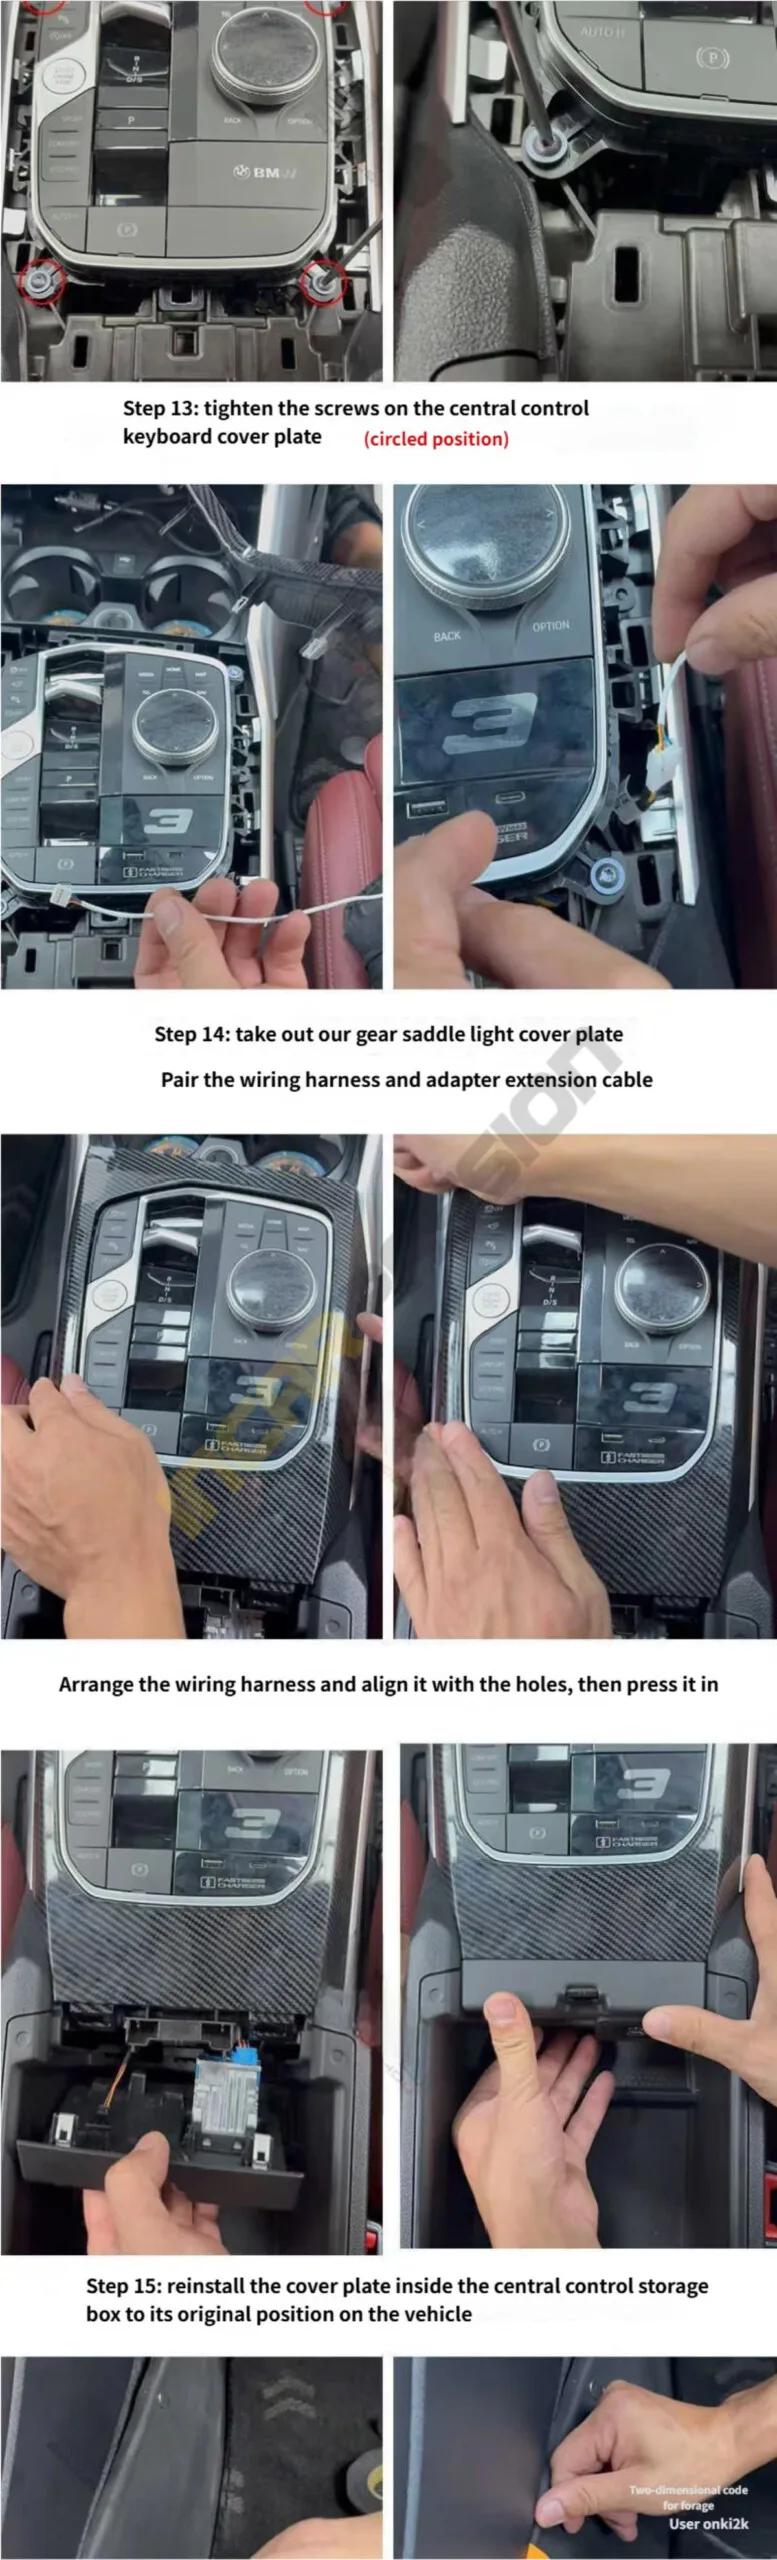
Unscrewing the Controls: I located the screws holding the central control keyboard/button cover (check the circled positions in the photos) and unscrewed them.
Unplugging: I carefully disconnected the wiring harness behind the button cover and removed the two Torx screws tucked inside.
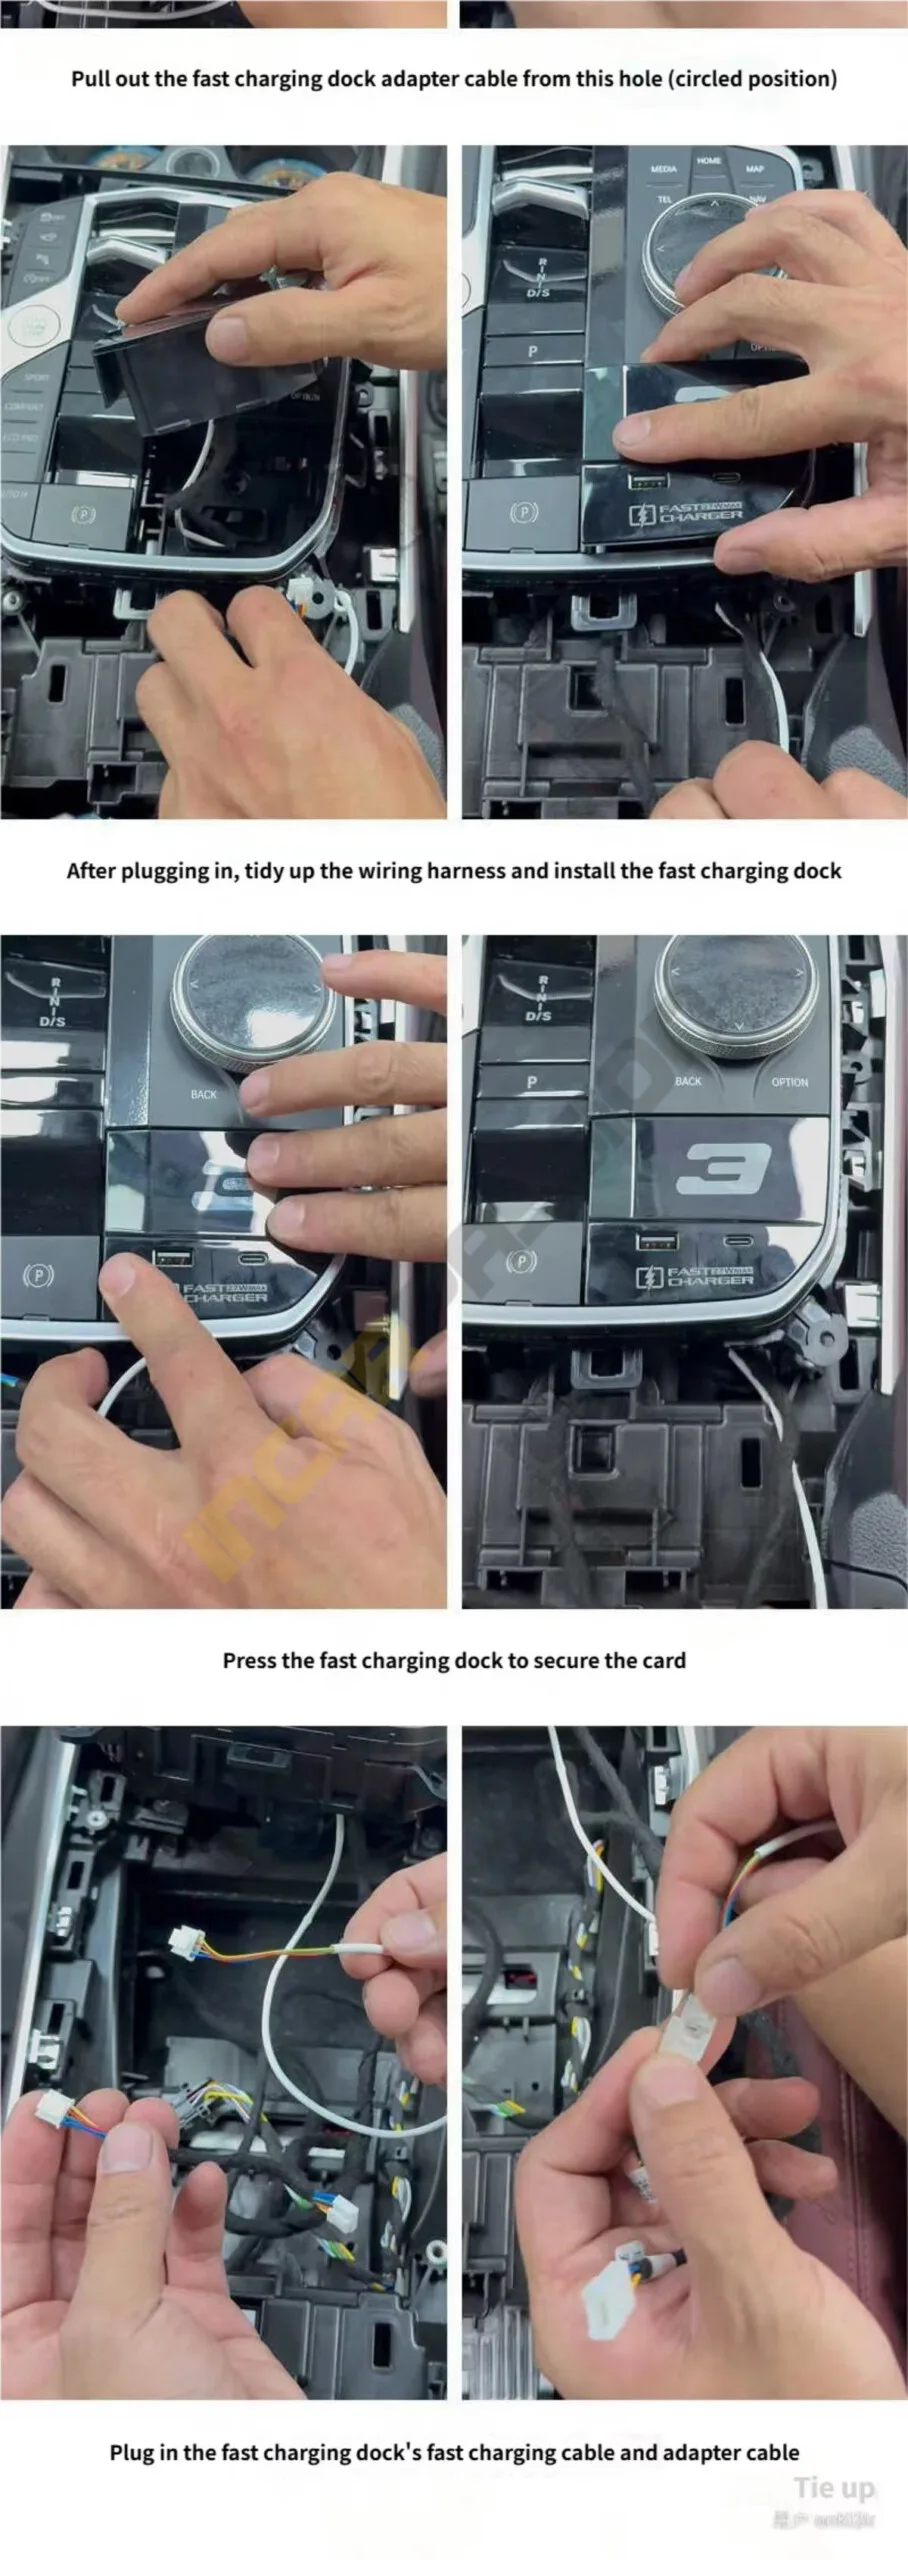
The Final Piece: I tilted the small buckle and removed the original small cover plate to clear the way for the new charger.
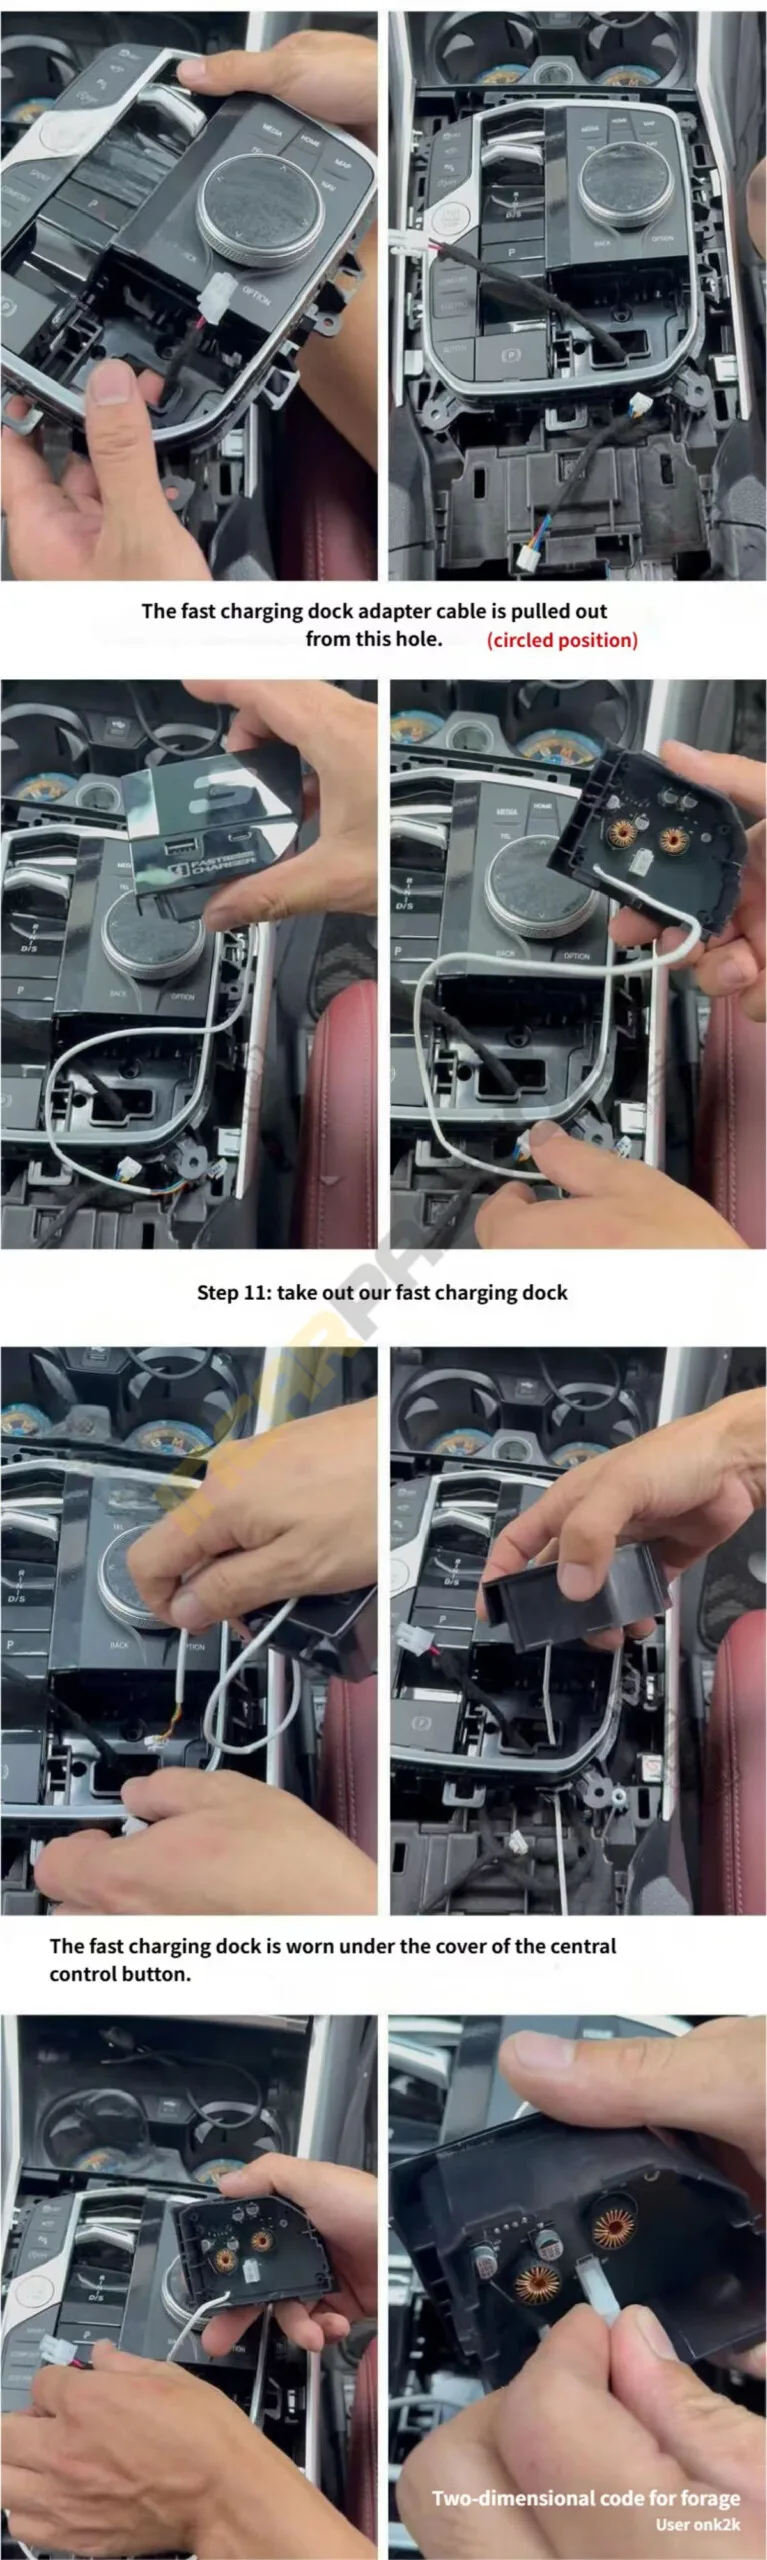
Fishing the Wires: This part requires some patience. I used a rubber strip tool to pull the wiring extension through the console over to the passenger-side footwell position.
Securing the Harness: I used the provided adhesive strips to keep the adapter cable snugly in place so it doesn’t rattle later.
The Upgrade: I grabbed the new Fast Charging Dock and connected it to the adapter cable.
Alignment: I carefully arranged the wiring to avoid pinching, then aligned the button cover back into its original hole positions.
Securing the Panel: I tightened the screws back onto the central control keyboard panel.
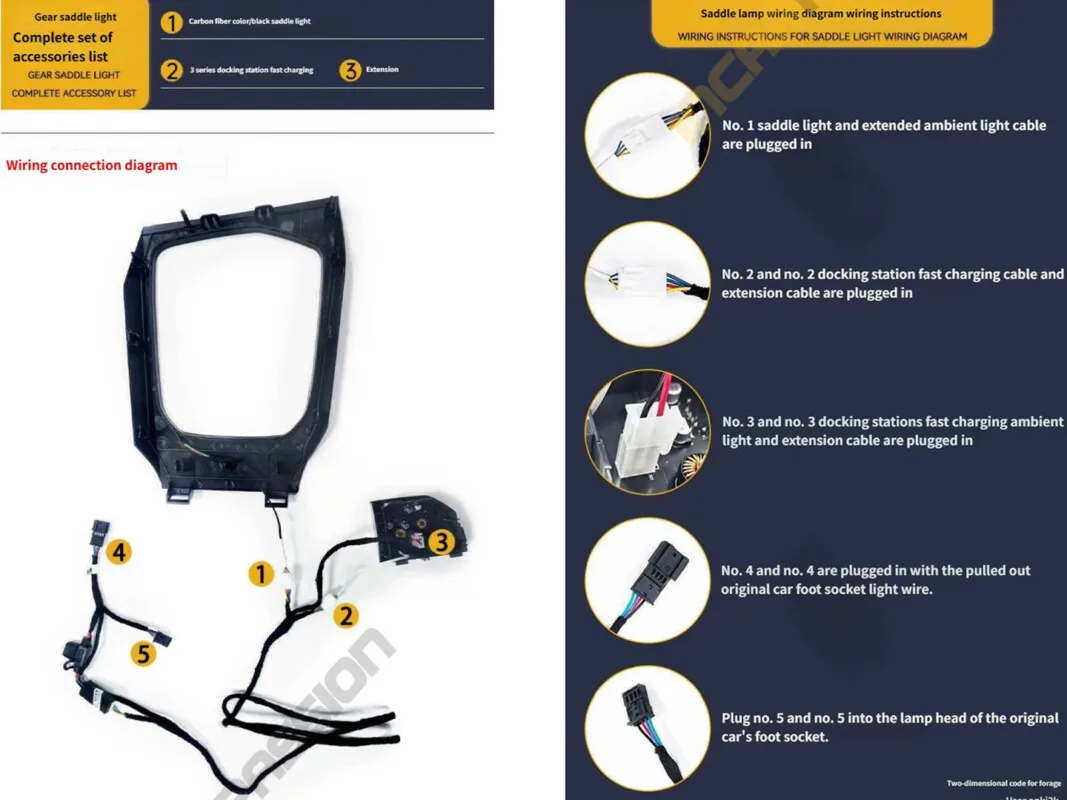
The "Light Up" Moment: I took the new gear saddle ambient light cover, paired its wiring harness with the extension cable I routed earlier, and snapped it into place.
Putting it Back Together: I reinstalled the inner cover plate of the storage box.
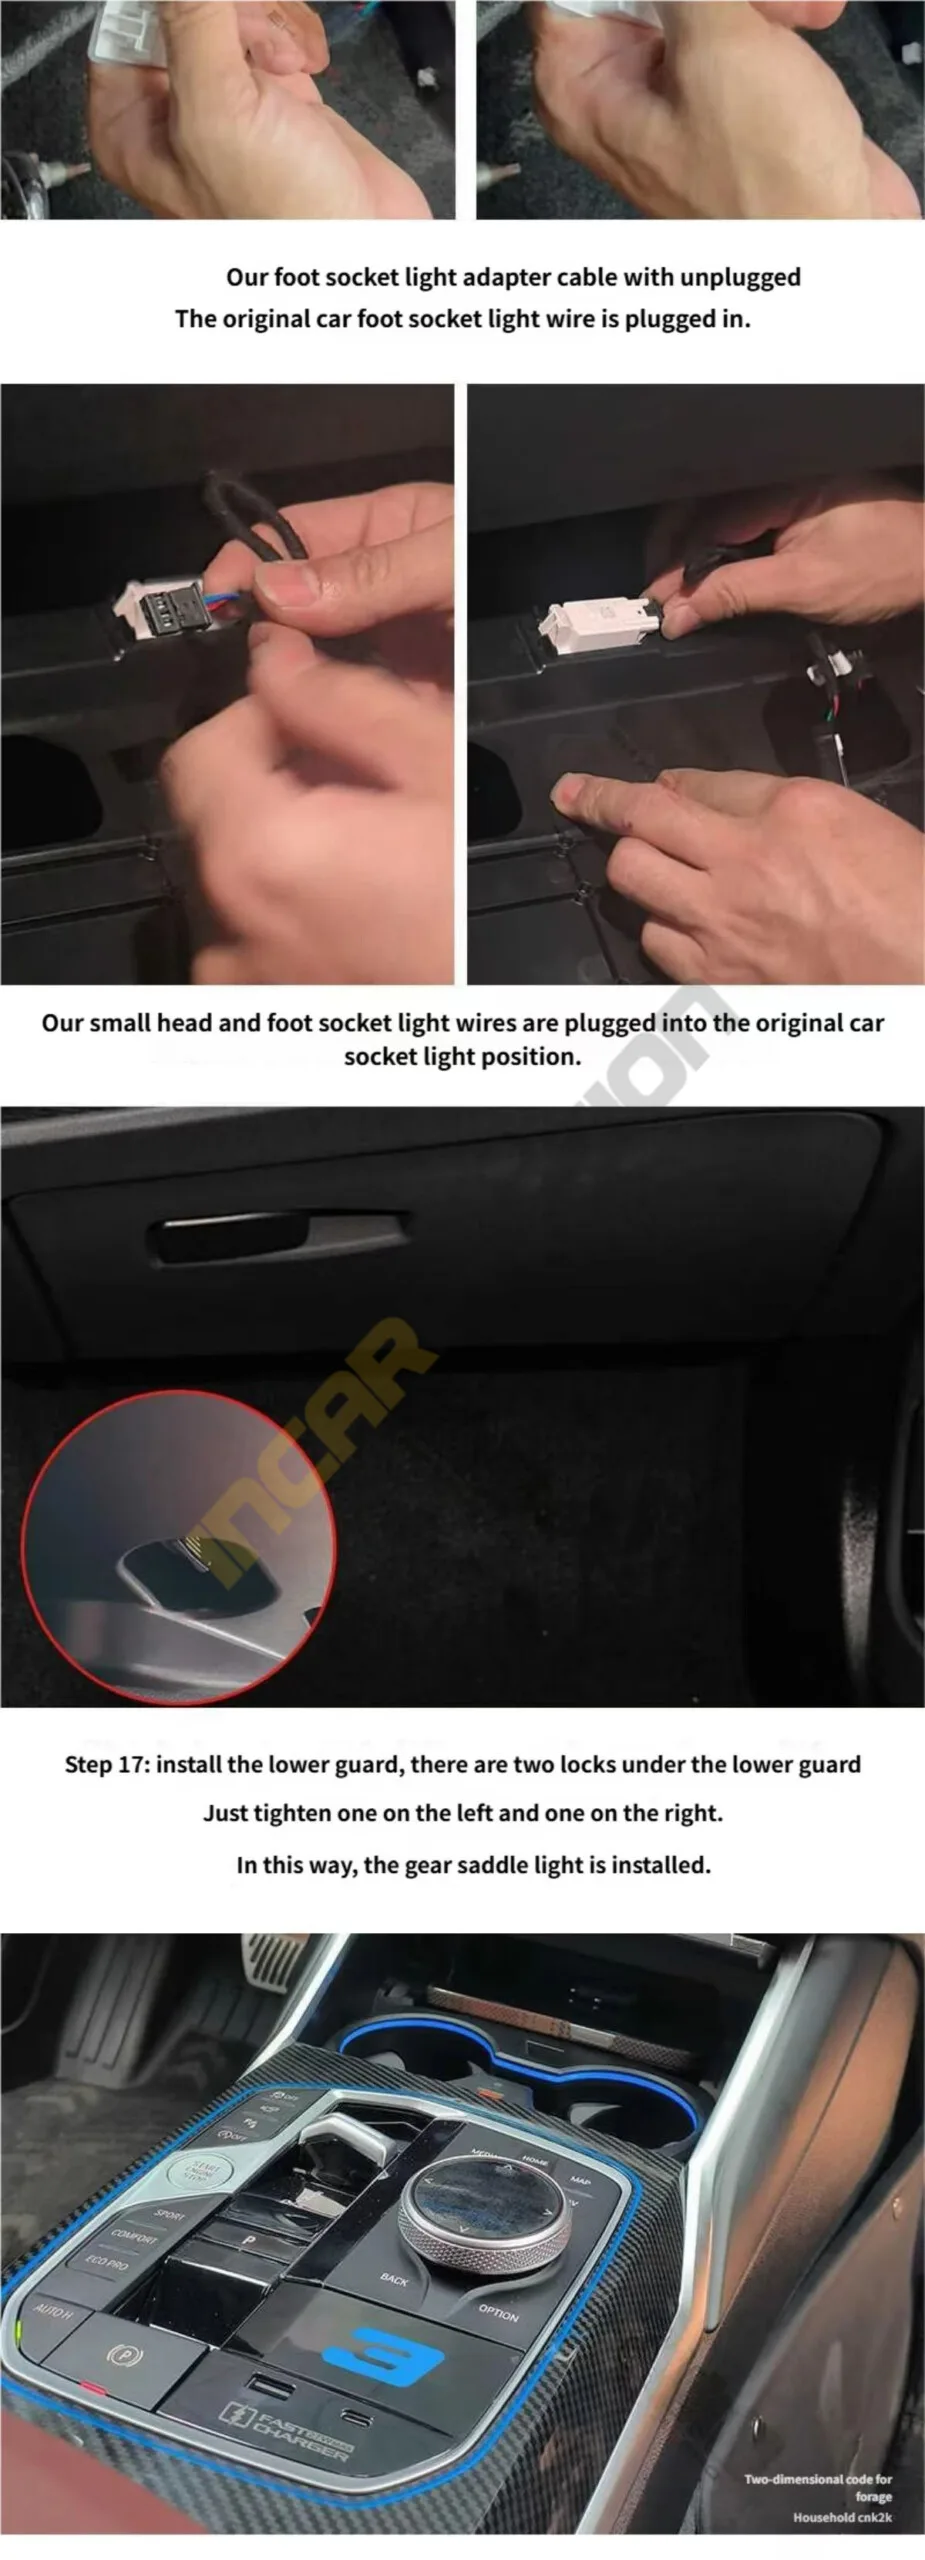
Footwell Connection: I routed the final tail of the cable from the passenger side down to the footwell light area to tap into the power source.
Sealing the Deal: Finally, I reinstalled the lower guard panel. There are two locks—make sure to tighten one on the left and one on the right to keep everything solid.
Before you start your DIY project, double-check your chassis code. This ambient light and charging dock upgrade is designed specifically for the G2X platform. It is compatible with the following models:
BMW 3 Series (2019–Present)
G20 Sedan: 320i, 330i, 330e, M340i
G21 Touring: 320d, 330i, M340i
G28 LWB: Long wheelbase models
BMW 4 Series (2020–Present)
G22 Coupé: 420i, 430i, M440i
G23 Convertible: 430i, M440i
G26 Gran Coupé: 420i, 430i, M440i
G26 i4: eDrive35, eDrive40, M50 (Note: Interior trims may vary slightly for 2023+ LCI models with the curved display)
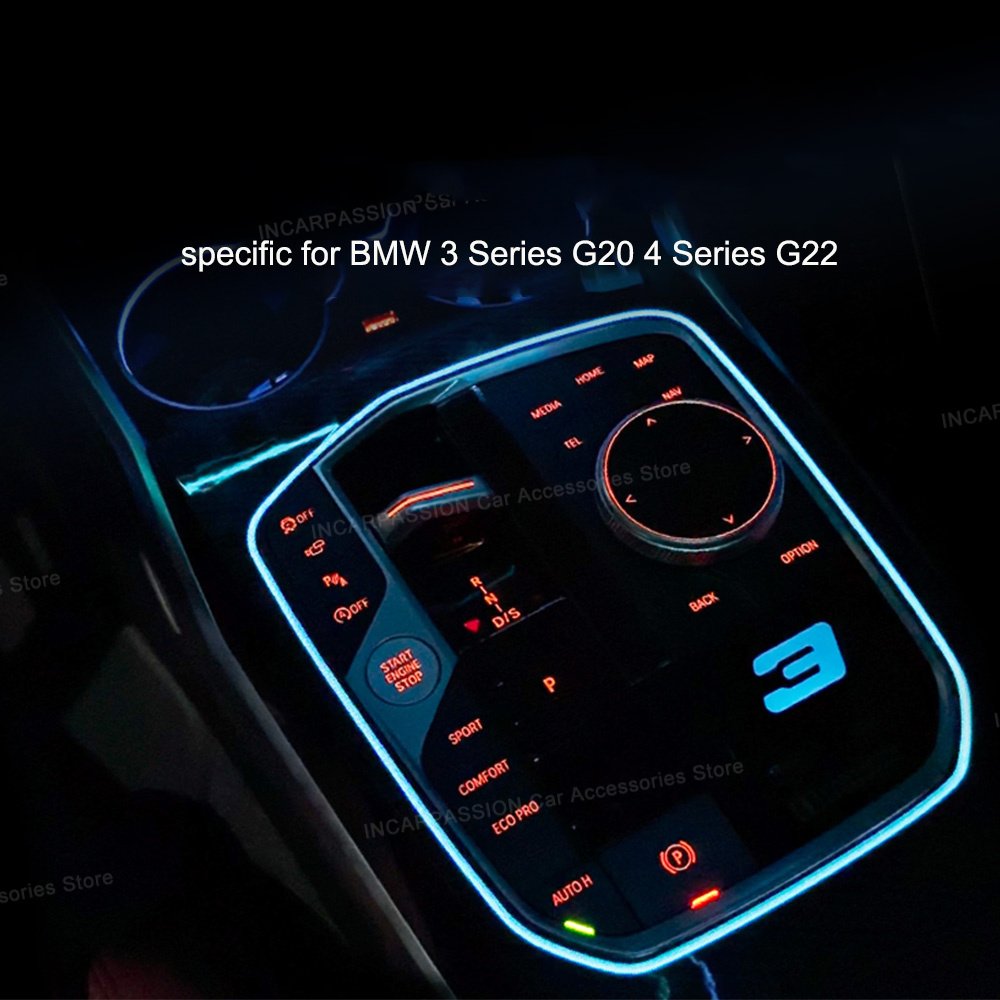
If your gear shifter and center console look like the ones in my photos, you are good to go!
WhatsApp us